Getting started with Git
Wed, Jan 24, 2018Before we starting on the more advance elements of git, please make sure you have completed steps 1-4.
Step 1. Install
Install GIT
Step 2. Intialize Git
First of all go to the folder you want git to manage. use the “git init” command.
git init
The “git init” command creates an empty git repository in the current directory
Step 3. Configure Git
Gto configure git with yoyr name and email, you can use the commands below.
git config user.name <YourName>
git config user.email <YourEmail>
To confirm git is configured with your name and email use the command
git config -list
you should see output similar to this.

Step 4. Adding something for Git to track
For this blog I will create a webpage called “charityWebPage.html”. To create the webpage use the following command.
nano charityWebPage.html
Now to stage the webpage and commit it.
Us the command below to only stage charityWebPage.html webpage.
git add charityWebPage.html
To stage everything in the folder use “git add .” The . after add means everything in the current folder.
Now to commit we use the following command.
git commit -m 'intial version commit'
The -m tag adds a message which in this case is “intial version commit”.
To check if commit was successful, you can use the “git log” command and you will see output like

To view a one line output from git log use the “git log –oneline” command.
To test out git make a few changes to the webpage afterwards staging and commiting. When finished run the “git log” command.
Reverting to a previous version
Using the “git log –oneline” command to find the sha of the commit

To revert back to the fourth commit I use the command
git checkout <shaOfCommit>

Another way to do this is to use the command
git reset --hard <shaOfCommit>
the –hard flag means revert all files back to this version too.
Branching
To branch a version, we must first check it out by finding the SHA of the commit and using the checkout flag We can use the “git log –oneline” command to find the sha of the commit. After finding the sha use the “git checkout <shaOfCommit>” command to check it out.
you should see similar to below.

Now we use the “git branch `
Now to switch to the new branch we use “git checkout new_webpage”
We are now on the new branch and we can create a new webpage using nano, we can then merge these changes with the master later.

Merging
Now to merge these changes with the master, I must change back to the master branch using “git checkout master”

Now to merge the branches together I use the “git merge new_webpage” while on the master branch.
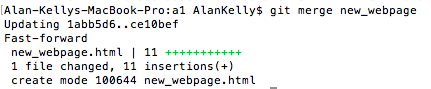
As you can see the branches merged without any conflicts.
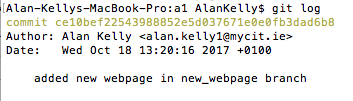
Now to check the log to confirm the merge
Versioning
Now to add a tag for versioning we can use the “git tag <tagname>” command.

in the command above I added an annotated tag “v1” using the –a flag and used the –m flag to write a message which is “version 1”
there are two types of tags annotated and lightweight. To use lightweight tags just use the following command “git tag <tagName>”
if I want to see the tags I can use the “git tag” command

If I want to see how many commits have happened since the last tag I can us the “git describe” command

the number 3 after “v1-“ is the number of commits since this tag was added. The g in “g55cac8d” means git managed and the “55cac8d” is the last commit in this version.
To find more info about the tag or version you can use the command “git show <tagName>”
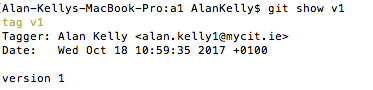
As you can see it shows the tag creator and the date. It also shows the messaged added when the tagged was created in this case “version 1”. If you created the tag and needed authenticity, you would see the gpg or other signature used to sign the tag here also.
Stashing
Stashing is used when you have made change and would like to change branch but don’t what to commit the changes you have made.
To create a stash you must first have uncommitted changes. To do this I opened the file charityWebPage.html and edited it using nano.

Now you stage the changes using “git add <filename>” or by selecting all using the . symbol.

now to check the status to make sure the changes were staged.
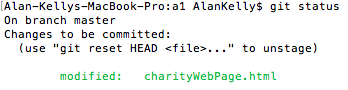
Now I want to switch branches but don’t want to commit the changes. I can do this using the command “git stash”

Now if I do a “git status” it will say it is clean

I can view the list of stashs using “git stash list”

now to reapply the stash I can us the command “git stash apply”. This will then apply the most recent stash. If you would like to use another stash you can do this by using the id of the stash for example in the stash list above the only stash is 0 as you can see from its name stash@{0}:, let pretend there is a stash 1. To apply this I would use the command “git stash apply stash@{1}”. By default the command “git stash apply” will apply the most recent stash.
When you apply the stash you will be prompted with similar to below.
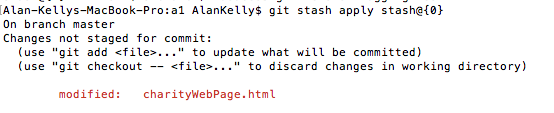
after applying the stash the changes in the stash are no longer restaged. To apply a stash and have them staged you must use the command “git stash apply –index”
to delete a stash you can use the “git stash drop <stashName>” so for example the below command will delete the stash@{0}.

To apply the most recent stash and then immediately drop it you can use the command “git stash pop”. To apply another stash and immediately drop it use the command “git stash pop <stashName>”
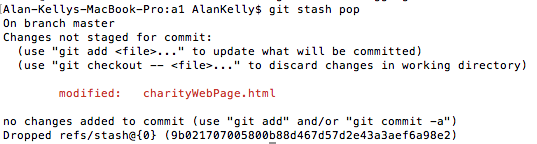
Above I apply the most recent stash and dropping it immediately afterwards.